Delivery Schedules
Delivery Schedules are required to manage the dates and cut-off times used for placing orders.
Both head office and supplier users can be setup to configure delivery schedules for the customer.
Delivery Schedules Topics
Adding Schedules
You can create new and edit existing schedules and exceptions. You can also search by outlet.
When an order is placed, the delivery dates offered will adhere to the defined schedule
If delivery schedule notifications have been enabled an email message will be sent out when the delivery schedule upload is complete.
Follow these steps to add a new deliver schedules:
-
Under Create New Schedule, select the Supplier for which you want to create a new schedule from the drop-down list
-
Click Create Schedule
-
Enter a name for the new schedule in the Name field (Mandatory field)
-
Select a start date for the new schedule from the drop-down calendar (Mandatory field)
-
Select Add Week to define the delivery schedule
-
Select the days on which the selected supplier can deliver
-
If the delivery days can differ from week to week, you can define a rolling schedule by adding multiple weeks
At the end of the defined schedule, the system will start again from the beginning
As many weeks required can be added -
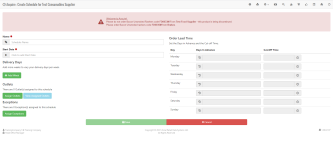
Define the lead time for orders by setting the number of Days in Advance of delivery that orders need to be submitted for each day. You can type a number or use the up and down arrows
-
Enter the cut-off time in hh:mm format before which all orders need to be submitted for each day
-
The same Days in Advance and Cut-off times defined for each day applies to each week on the schedule – you cannot vary these fields on a week-by-week basis
-
Click Assign Outlets to assign outlets to the schedule
-
Select the check-boxes of the sites you want to assigned to the new delivery schedule. If you need to narrow down the search you can filter the outlet list by selecting a group or a tag, or you can enter the site name into the search field and the outlet list will be updated accordingly. Select OK when complete
You can check the list of outlets assigned to the schedule by selecting View Assigned Outlets -
If you want to assign an exception, select Assign Exceptions
-
Select the required exception check-box and select OK. You can enter a search term to filter the list of exceptions if required. The assigned exception is added to the schedule
-
Click Save
Editing Schedules
Follow these steps to edit schedules:
-
Under Edit Existing Schedule, select the Supplier whose schedule you want to edit from the drop-down list
-
Select the schedule you want to edit from the drop-down list
-
Click Edit
-
Edit the schedule as required and click Update Schedule to apply your changes. For further information about the individual settings, please refer to the procedure for adding a schedule in the preceding pages
Upload / Download Delivery Schedules
You can upload multiple delivery schedules or upload multiple schedule exceptions simultaneously by uploading a CSV file (Head office when configured only). If you don’t have a suitable CSV file, you can create a new one by downloading a CSV template or by downloading an existing supplier’s delivery schedule and making your required modifications.
Download Delivery Schedules
You can download a blank CSV template or an existing supplier’s delivery schedule. You can create a new delivery schedule in the correct format or update an existing delivery schedule as required.
Follow these steps to download a blank delivery schedule csv file:
-
Select the Upload Delivery Schedules option from the drop down
-
Select Download CSV Template
The CSV template can now be edited in another application
Follow these steps to download an existing suppliers schedule:
-
Select the Upload Delivery Schedules option from the drop down
-
Select a Supplier from the drop down
-
Select Download Delivery Schedule to download a delivery schedule for the selected supplier and company
-
Update the delivery schedule as required, or modify it for a different supplier in a third-party spreadsheet application and save it with an appropriate name for upload
Upload Delivery Schedules
All delivery schedules uploaded will be assigned to the outlets defined within the CSV file.

Follow these steps to upload a deliver schedule csv file:
-
Select the Upload Delivery Schedules option from the drop-down list
-
Upload the file by dragging it into the upload section, or clicking Browse to locate the file on your computer
-
Click Upload
A progress bar will be displayed when uploading large files.
You can initiate the upload of multiple files at the same time and then continue with normal operations in Acquire while the upload is in progress
The import file must contain the outlet and company supplier references, schedule name and start date values to ensure that delivery schedules are accurately updated
If errors are detected during the upload process they are displayed, expanding the errors section will display show more information. The line number on the error references the line in the CSV file and can be corrected for re-uploading
Additional Information
-
Acquire will process all correct delivery schedules. Delivery schedules with errors are not processed and form part of the error log shown above
-
The import file header must contain the column names Company SupplierReference, OutletReference, ScheduleName, StartDate. These are case-sensitive as shown in the example above
-
The Company SupplierReference value is set by the Head Office on the Supplier References page
-
The OutletReference value is set by Head Office under Admin Functions via the Manage Outlets page. This is a different reference to the Supplier Outlet Reference set in the Supplier References page
-
The StartDate field must be in the YYYY-MM-DD format